Last updated on October 20, 2022
How to fix your HP, DELL, LENOVO, ACER broken laptop screen in Bahrain
Before starting, ensure you have the proper tools. Here’s what works for most laptops:
- Table or other flat working area: You’ll need a spot to sit (or stand, if that’s your thing) with a flat area to work on your laptop. This gives you a reason to clean off that messy dining-room table or desk.
- Small-head magnetic philips screwdriver: Not small like a mini screwdriver from an eyeglass repair kit, but I’d say between that size and a mid-sized screwdriver would work. If you don’t have a magnetic-head screwdriver, try to find a magnet big enough to magnetize the driver head. This helps the screws stick to the head, making it much easier to remove and replace the screws without cursing as they fall all over the place.
- Safety pin or needle: This is for removing the cover stickers that are hiding the screws on your laptop’s surrounding cover, called the bezel.
- Plastic putty knife or other thin object: This is optional, to aid in prying apart the screen bezel from the case. Personally, my finger nails usually do the trick. If you do use another object, ensure it’s thin enough but not so sharp that it will leave scrapes or other evidence of prying.
- Small bowl or other container: This is for stashing the small screws—and keeping them safe from curious cats and children.
These general steps work for most laptops:
- Ensure the laptop is unplugged from the AC adapter. Remove the laptop battery as well.
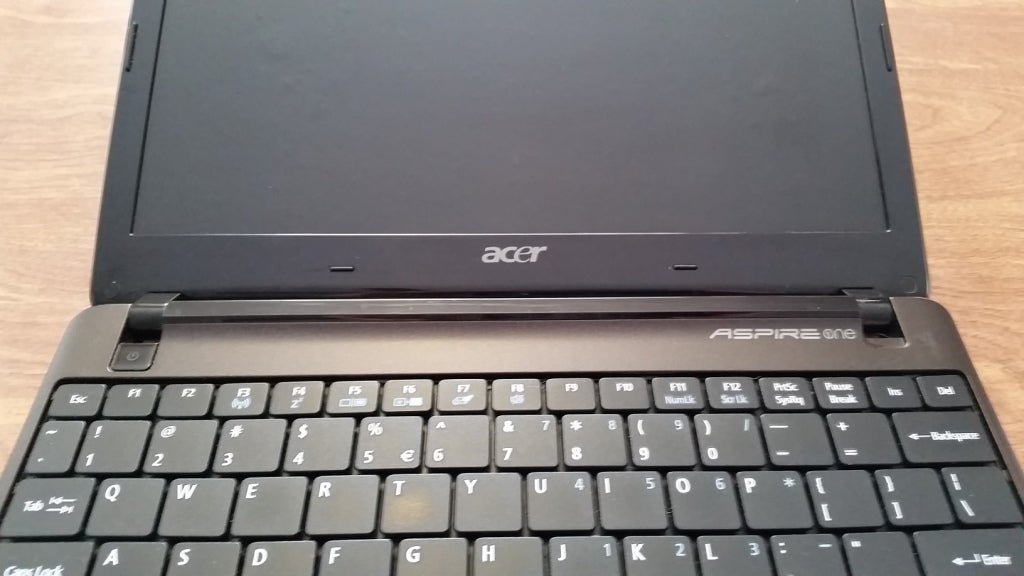
- Find the round cover stickers that are hiding the screws on the screen bezel, the case surrounding the screen. These stickers are usually on the bottom of the bezel, near the screen hinges, when you have the screen opened. You should find one on each side of the screen.
You can see the screw covers in the very bottom right and left corners on the bezel of this Acer Aspire One. (Click any image in this article to enlarge it.)
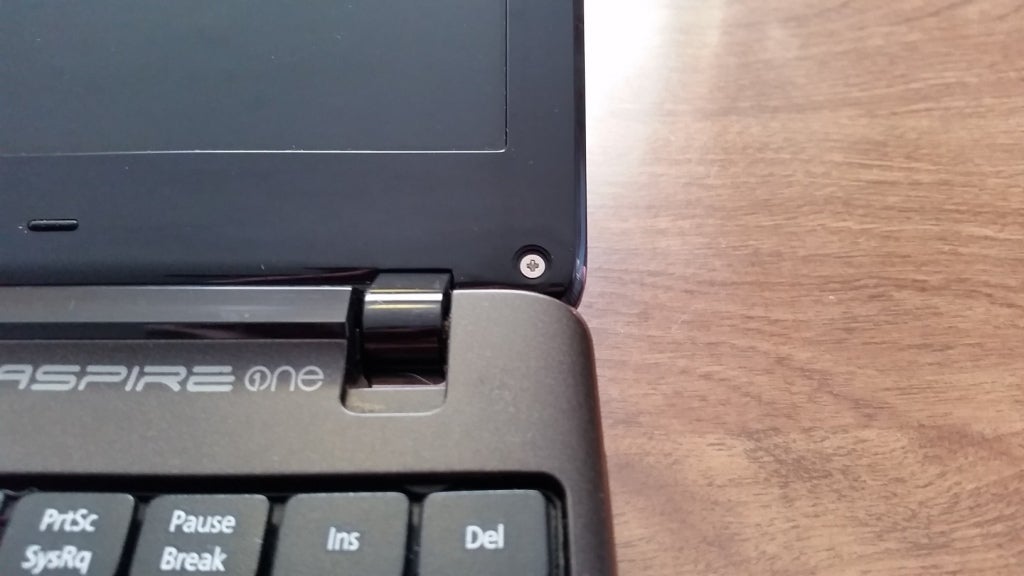
- Use a sharp, pointy object—like an opened safety pin or needle—to help remove the cover stickers without damaging them. Stick it between the edge of the cover and bezel, and then pry the sticker away. Once removed, place the covers in a safe spot, with the sticky side up to help ensure there’s enough stickiness when you place them back on.
- Use your screwdriver to remove the now-exposed screws. Remember: righty-tighty, lefty-loosey. Some screws are easy to remove; others, not so much. But moving the screen into just the right position usually exposes the screws enough for removal.
After you remove the sticker covers, you’ll find screws.
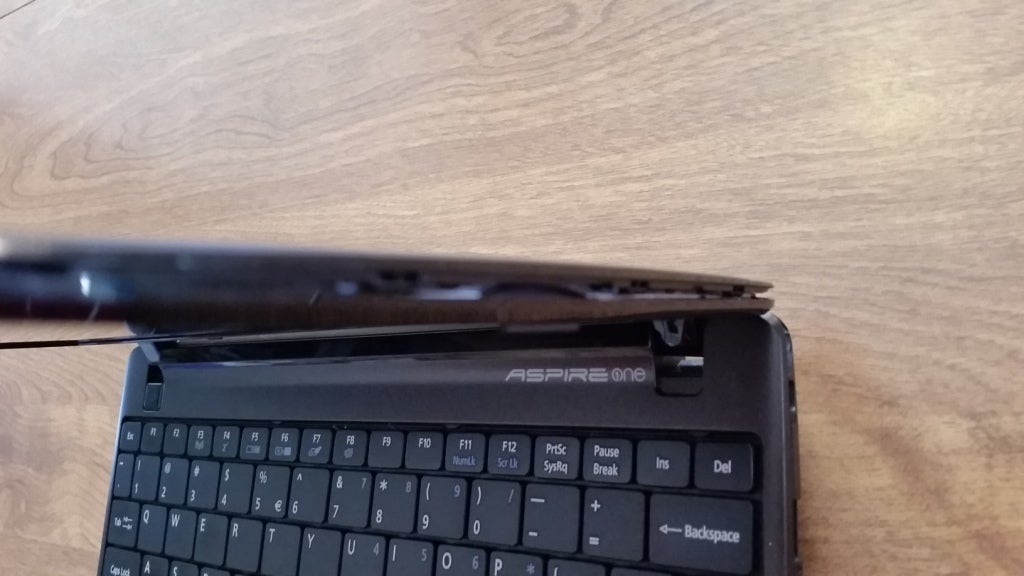
- Carefully start prying the screen bezel away from the back side of the screen case. Work a fingernail or other thin, prying object into the crack around the outside of the screen. The bezel is usually secured to the back case with plastic snaps, so give it some force while prying—but not too brutish. You’ll hear the unsnapping of the fasteners when prying.
In process of prying and unsnapping the bezel of the screen from the back case.
- Once you’ve unsnapped the screen bezel, it may or may not be easy to remove. If not, it’s likely stuck around the screen hinges. Moving the screen position up or down, with some gentle force if necessary, should free it fully.
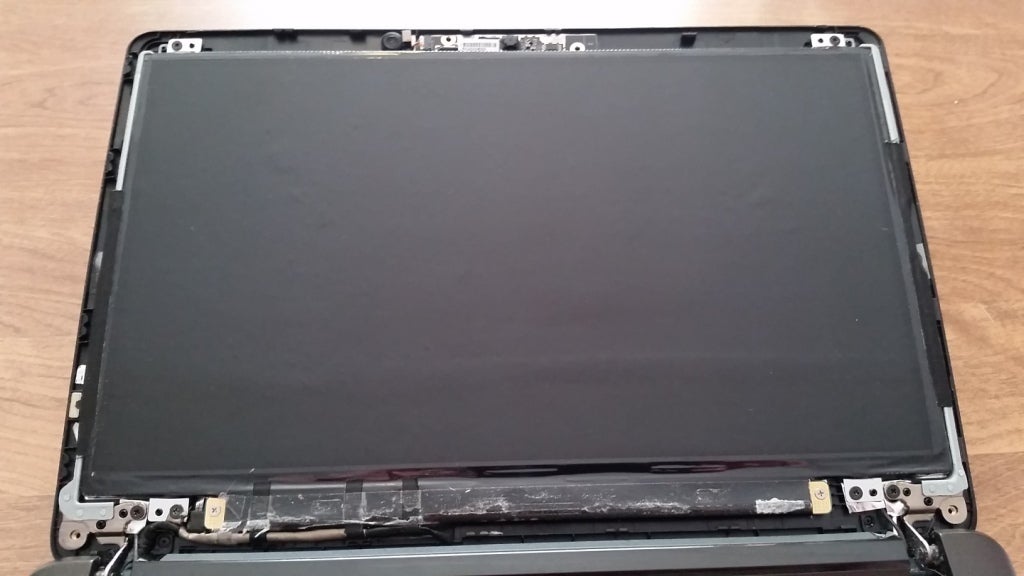
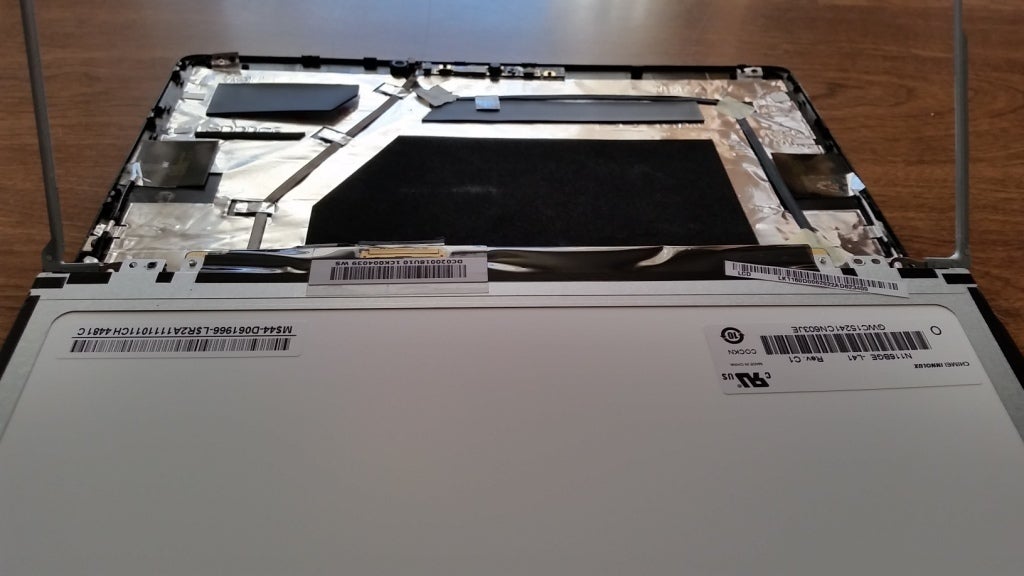
After removing the bezel you’ll find the screen is secured to metal frame pieces on each side.
- Once the bezel is fully removed, you’ll find the LCD secured to a metal trim frame on the left and right sides. Remove the two screws (one on each side, on the top) holding the trim frame pieces to the back screen case. Now, you should be able to lift the LCD (with the trim frame pieces attached) slightly away from the back screen case.
- On each of the trim frames’ sides, remove any screws that are securing it to the LCD. Most laptops have three screws on each side; however, the smaller laptop I photographed here doesn’t have these screws—the LCD is actually secured to the trim frame pieces by tape on each side.
Here is where most laptops will have screws securing the LCD screen to the metal trim frame pieces.
- Now you should be able to set the LCD face-down onto the keyboard. Be careful not to put excessive force on the video cable attached to the back of the LCD.
The LCD has been freed from the trim frame pieces and carefully sat down on the keyboard.
- Disconnect the video cable from the back of the LCD. Though the laptop I photographed here has the connector on the very bottom, most laptops have the connector near the center. If so, keep in mind that the portion of the cable running down the screen is usually stuck on the back of the screen with some mild adhesive. Just gently pull the cables away from the screen. You usually must remove tape that’s securing the video connector to the back of the screen as well. When you get to the point of actually pulling the video cable out of the screen connector, it should unplug with little force.

Unlike most laptops, this cable connector is on the very bottom of the LCD screen.
- Once you’ve fully removed the broken LCD, simply place the new one face-down like you did the old one. Reattach the video cable to the connector and place the cables and any tape just like they were for the old one.
- Set the new screen up in the side trim frame pieces, then re-secure it like the old one was: usually three screws in each side of the trim frame pieces, and then a screw on top of each to secure it to the back screen case.
- When you get to the point of putting the bezel back on, just line it up and push/squeeze the bezel back into the snaps of the rear screen case. Before replacing the bezel screws, ensure the bezel is fully snapped in place and no crack exists around the edges of the screen case. Lastly, use that safely pin or needle to reattach the sticky screw covers.
If all went well, you now should have a shiny new working laptop screen. Put the battery back in and test it out!